Planning a wedding could be a challenging TASK! Panic kicks in as soon as you are off schedule. Happened to me when it was 3 months to my wedding, a ‘Save The Date’ shoot was on my list and there was no photographer shortlisted. That’s when I got the idea of doing it myself. I did a lot of research, surfed the net for ideas as and when I had little bit of time & decided on clothes, theme and a location for the shoot. I thought of going for a rehearsal first and plan a final shoot on some other day, if the rehearsal goes well. Turns out, it was so well, I didn’t go for another shoot at all!
You do not need to be a Professional Photographer to do your own Photoshoot. As long as you have a DSLR or a decent camera, Tripod, Amazing Outdoors and a little bit of Sunshine, you are good to go! Here is how you can do your own Save the Date shoot by yourself! It’s all about how you make a simple shoot different and cute, by choosing a decent gear, suitable weather, unique theme and perfect smile!
Camera Gear:
You can use any DSLR or point and shoot camera at hand, along with a Tripod. Since, you will be clicking your pictures by yourself, it’s best to mount the camera on a tripod and take multiple shots with timer. The best times to shoot are early mornings or evenings, to capture the most amazing pictures with appropriate exposure and light, you will definitely need a timer. I could connect my DSLR with my phone, which was very helpful while taking shots far from the camera, where I need not run to the spot I wanted to get clicked from after hitting the click button. A clean memory card would be good enough to keep all the pictures you click. Remember you will be clicking a lot of multiple shots and choosing the best from hundreds of pictures.
The Setting:
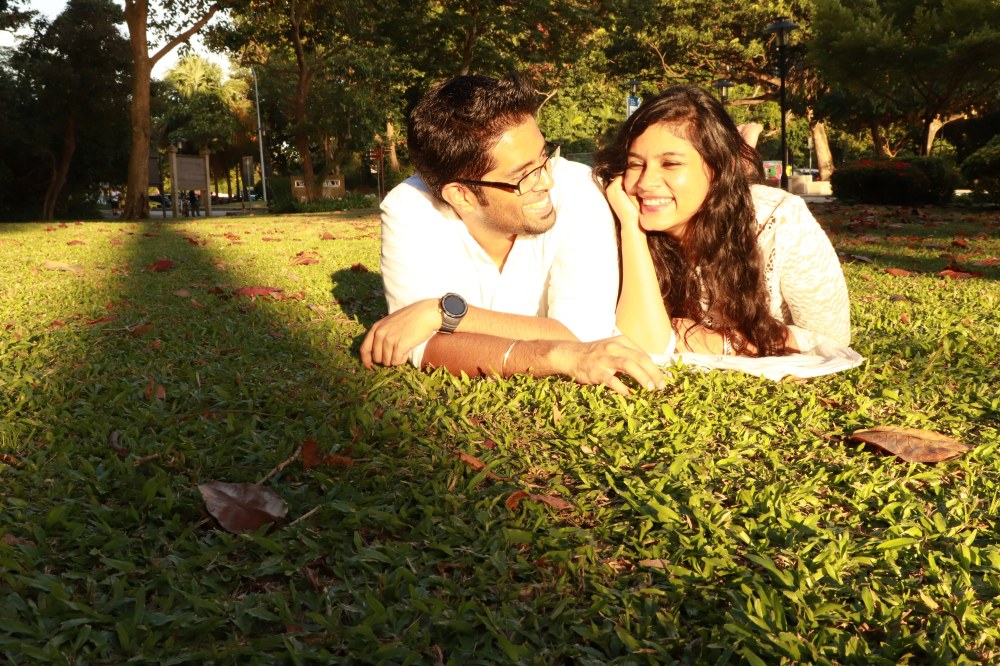
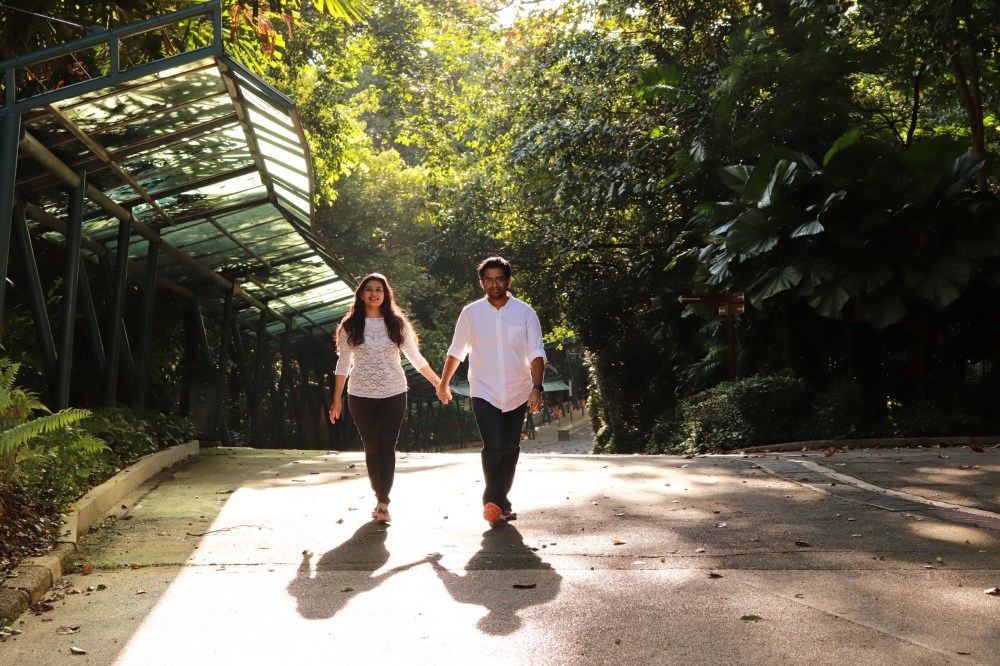
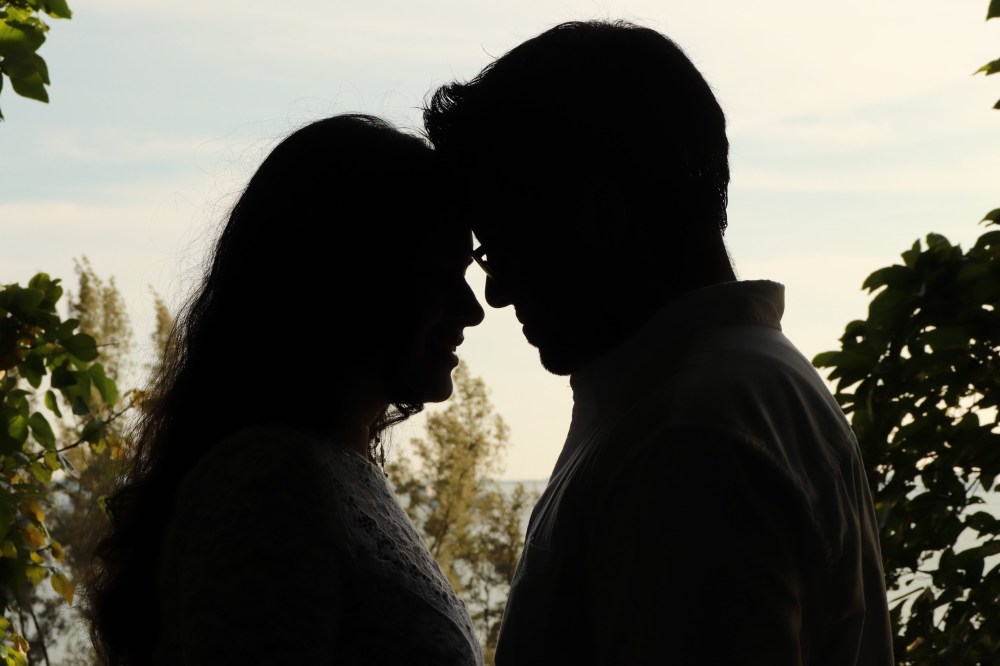
One of the most important things you will need to brainstorm is the location of the shoot. Why is it important? Basically, the focus would be on you and your partner, a good background will actually enhance your pictures and make them more professional. Your pictures might not have a lot of depth, but little bit of background showing here and there will play an important role in giving an edge to the pictures you take and differentiate it from a casual picture. You may choose any theme: buildings, parks, streets, ocean, forest. A lot of people hike or go to an unexplored sea side and take the best of backgrounds. I was running out of time and chose simply a park to do the whole shoot. You can also choose multiple settings to bring variety to the pictures. Use dawn or dusk to do the shoot. “Golden Hour” has the optimum light for getting the perfect click with the right blend of colors in the sky! I always prefer an outdoor location to an indoor one. I used this location: Labrador Park, Singapore.
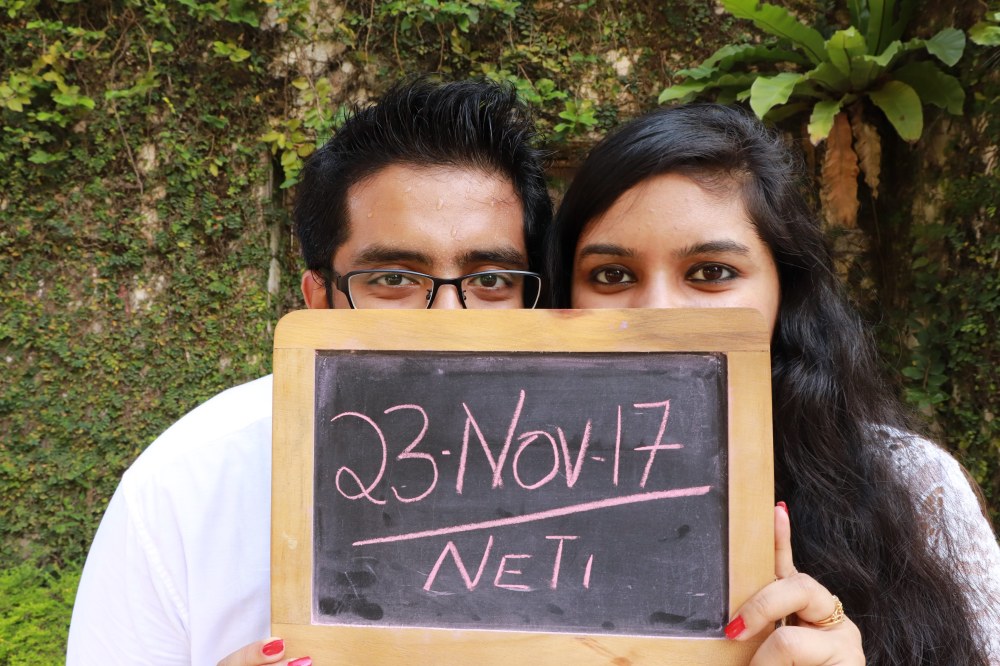
The Props:
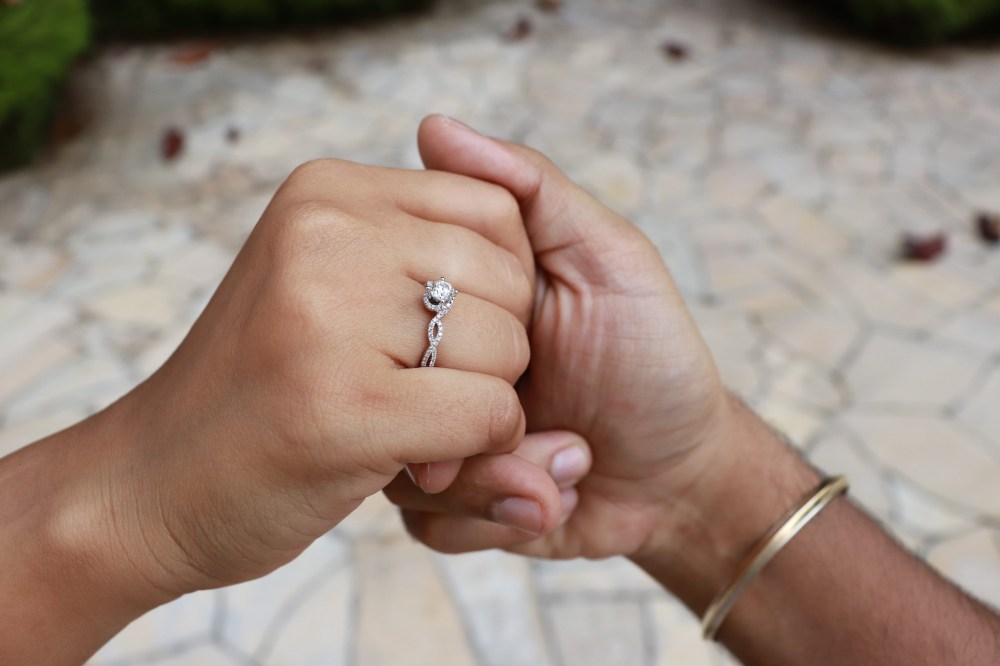
This can make all the difference. Wear contrasting colors to the background chosen. If your background has darker tones, choose a white or a lighter bright color. White and yellow for girls and whites for guys would be my picks. Similarly, if your background has lighter color tones (like ocean), wear a black or red or royal blue. This makes you and your partner (the subject) to stand out in the pictures. Apart from that, you can use simple props in the photos. A few of these props could be – rose bouquet, chalk board, umbrella, bubble makers, self-printed posters, glares, your wedding rings, scarfs, balloons. I will post a few pictures at the end of this post to see exactly how you can do wonders with a simple prop. If you need more ideas around props, just surf the internet and I am sure you’ll find tons of ideas on the props. The idea is to just keep it simple and beautiful so do not over do the choice of props. Pick the best five from a list and use them in your shoot.
The Clicks:
Use a tripod on timer mode with multiple shots. You can ask your partner to stand on the spot you want to get yourself clicked from and focus the camera properly with the correct depth and exposure settings. Keep a few poses in mind while getting yourself clicked. Easiest way is to surf the net and make a list of the poses you like the most. Be as natural as possible in front of the camera. Take candid pictures, try talking to each other and cracking jokes, no expressions of yours’ will seem made up. You can take pictures while talking, doing salsa with each other or laughing away, to capture the best of moments. Ones you have hundreds of photos in the poses, go through all of them and pick twenty of your favourite ones. Use an editing software or simple filters on your phone to make your images sharper and with the best color tones. You can download the Adobe Photoshop CC Trial version (7 days) and edit your pictures on Photoshop for best results. You can find a lot of Youtube videos and tutorials to tell you how to modify these pictures.
Once you edit your pictures, you can make a small video of still pictures, with your favourite track in background and titles on each picture. I used iMovie and added in titles. Here’s the video I made from my Photo Shoot pictures Here is the video..
Related posts:
Greens in Singapore: Top 5 photo-shoot locations!

One Comment Add yours